Related Stories
In Excel, format the cell so the text is left-aligned before adding a colon. The colon should then be displayed on the right side of the cell by using a unique number format, such as "@* ":"".
You can use a custom number format in Excel to have a single text followed by a colon always aligned to the right of a cell.
Here's how you can do it:
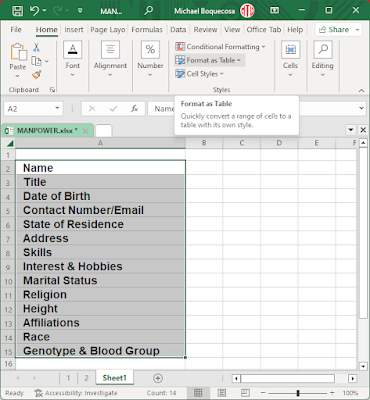
- Select the cell or range of cells where you want to apply the formatting.
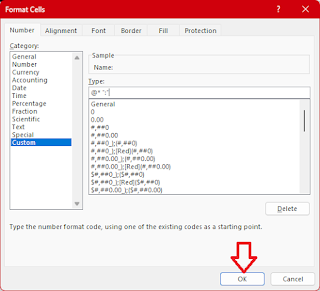
- Right-click on the selected cell(s) and choose "Format Cells" from the context menu.
- In the "Format Cells" dialog box, go to the "Number" tab.
- Select the "Custom" category.
- In the "Type" field, enter the following format: @* ":"
- The @ symbol represents text, and the colon (:) will be added after the text.
- Click on the "OK" button to apply the formatting.
Now, any text you enter into the selected cell(s) will automatically have a colon following it.
Please note that this formatting will be applied to the selected cells only. If you want to use it for the entire worksheet or a more extensive range of cells, select the entire worksheet or the desired range before going through the formatting steps.


Post a Comment
Hey... say something!